Using the App
The WeedManager app is designed to be used in the field. It provides a map of the management area and the ability to update management actions in the field.
- App overview
- Adding a weed or feature
- Adding a control or check
- Using the GPS to record weed locations and add a control
App overview
The WeedManager App is a companion to the WeedManager.NZ website. The app enables weed locations, density, controls, and checks on controls to be entered while in the field (including areas without cellphone coverage).
You can download the App from the Play Store or the Apple App Store.


Before you can use the app you need to create an account on WeedManager.NZ and join a project. Once you have an account on the website, you can use your email address and password to log into the App.
If you created a new project, rather than joining an existing project, you must also create a herbicide mix on the website before you can apply a chemical control.
When you first log in to the app you will be shown a list of projects you are a member of. Select one and you will be taken to the main map screen:

 Use the
  icon at bottom right to add a weed or feature,
- the
 icon at bottom left to add a control or check to an existing weed, and
 - the
 icon pressed will show your location on the map (you must allow WeedManager access to your location using the GPS on your mobile device).
Adding a weed or feature
When adding a weed or feature you have the option of adding a line, polygon, circle marker (point), or using a GPS track:
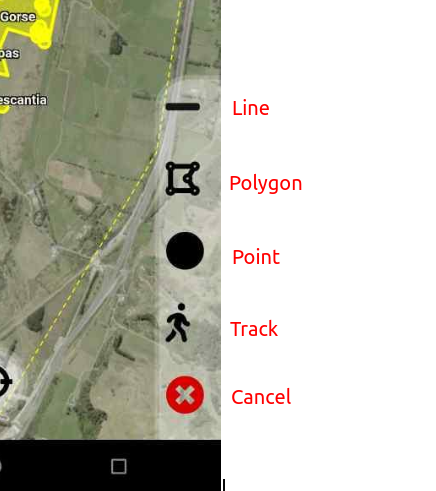
Tap on ![]() and select the shape you want to add, tap on the map to draw or drop a point. You can move points or line vertices after you have added them by touching and dragging the vertex.
and select the shape you want to add, tap on the map to draw or drop a point. You can move points or line vertices after you have added them by touching and dragging the vertex.
Once you have added the shape you can tap the Tick symbol to bring up the weed or feature entry form:

Use the tabs at the top switch from adding weed to a feature. When you have entered the information you need to press and hold the save button - the button will turn green and the form will disappear when the weed or feature has been saved / added. If you have added a weeds you can now select that weed and apply a control or a check.
Adding a control or check
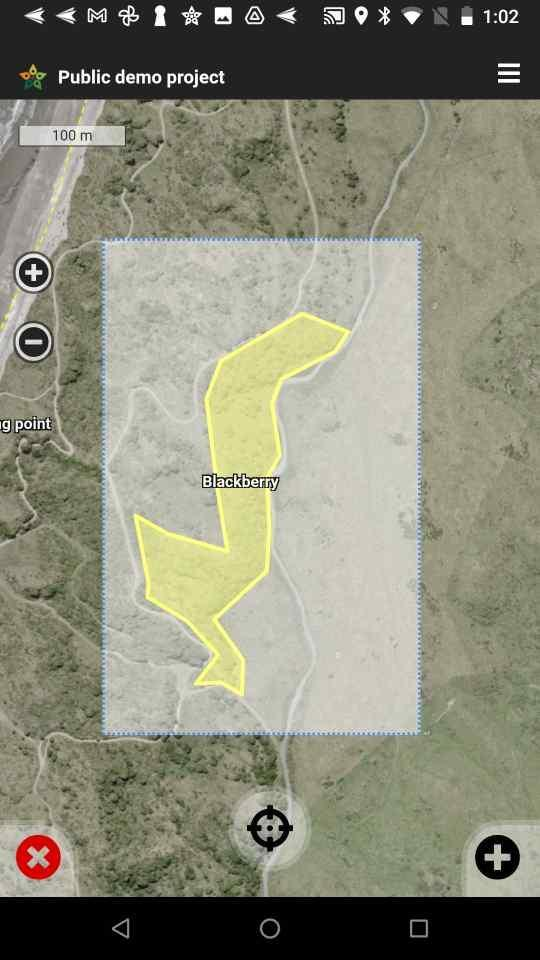
To add a control or check, zoom or pan the map so that the location of the weeds you wish to add is visible. When you Press the ![]()
 button at the bottom left it will turn into a
 ![]() (press the X if you wish to cancel adding).
(press the X if you wish to cancel adding).
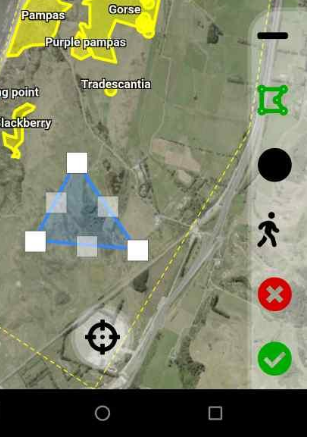
Next, either tap a single weed or drag your finger across the weeds that you want to add a control or check to - A rectangular guide will show the area of weeds to be selected:
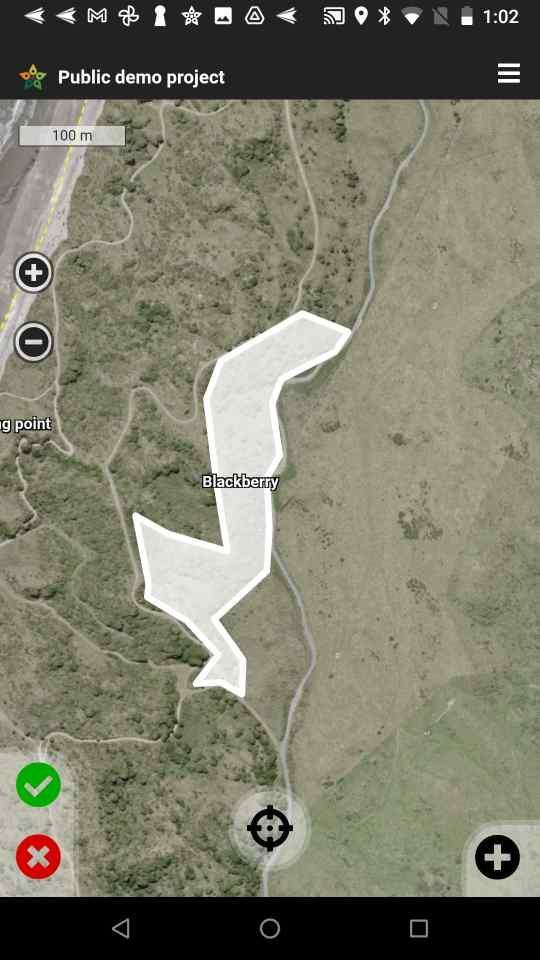
 Make sure the weeds you want to select are completely within the rectangle. When you take your finger off the screen the selected weeds will be highlighted. Tap the
 ![]() to add a control or check.
to add a control or check.

Use the tabs at the top switch from adding a control to a check. When you have entered the information you need to press and hold the save button - the button will turn green and the form will disappear when the control or check has been added - it will be applied to all weeds selected.
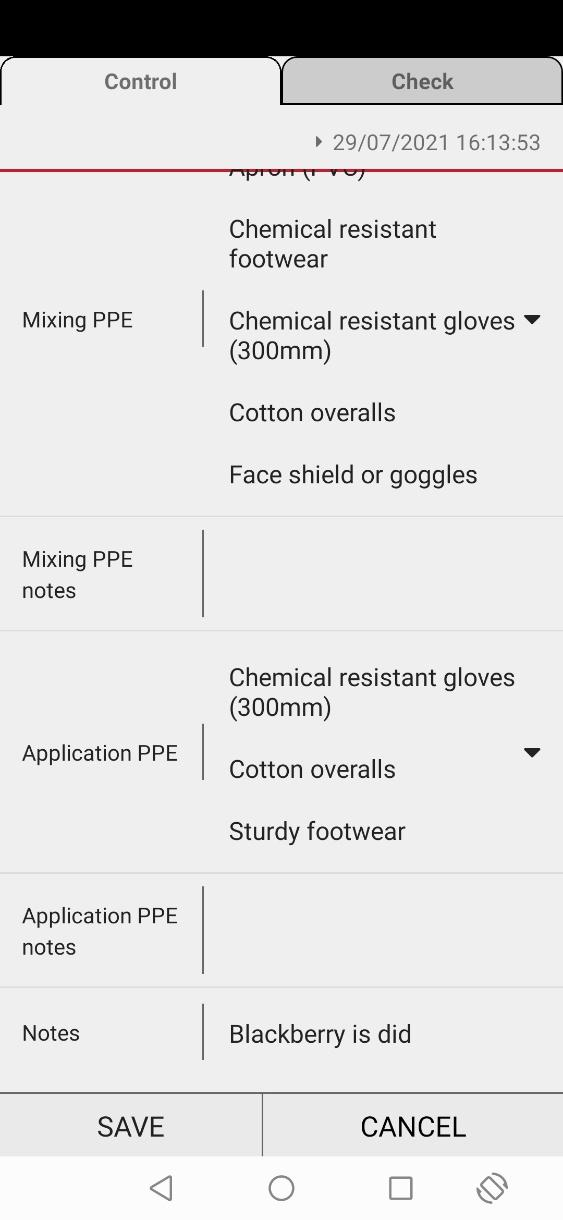
Personal Protective Equipment (PPE)
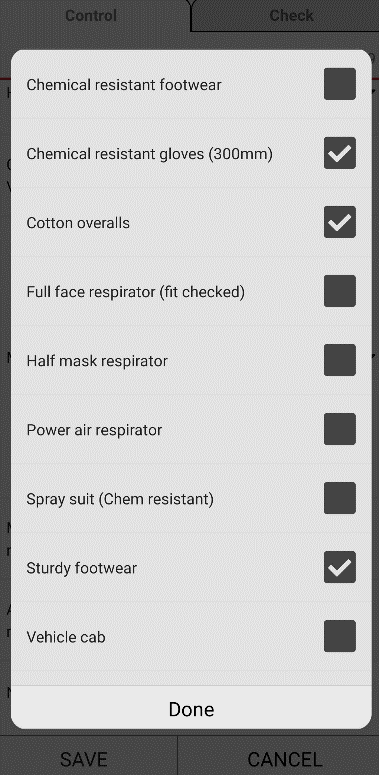
You can record the PPE you have used when carrying out a chemical control. A drop down list is available for both mixing and application phases of the task. The list is shown below. You can tick none or all of the listed items.
Using the GPS to record weed locations and add a control
This function could be used to prepare a digital spray diary entry out in the field during or after a control has been applied.
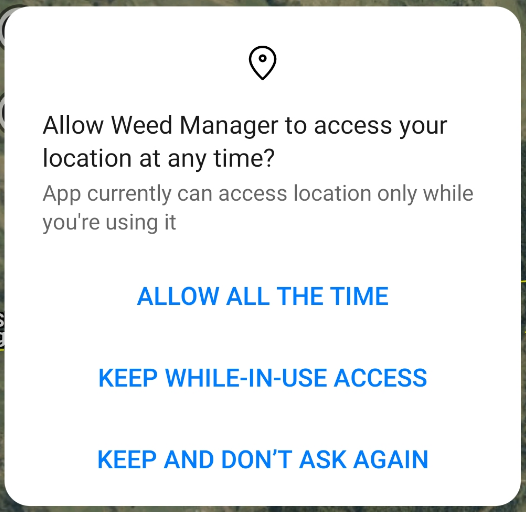
Go to your phone settings and turn “Location” or “GPS” to “on” When you first start Weedmanager you will be asked to allow access to you phone’s location. Tap on the option which suits you (normally the middle one on the right).
The mapping tools are shown to the left. Move close to where you wish to record and maybe control a weed. Clicking the ![]() icon will zoom the project map to your location. When you wish to start recording your location tap the black man on the mapping tools menu.
icon will zoom the project map to your location. When you wish to start recording your location tap the black man on the mapping tools menu. 


![]()
![]() The man will turn green and GPS tracking will be live.
The man will turn green and GPS tracking will be live. 
Once tracking is live you will be able see where you have been. When you want to stop recording your location, tap on the green tick. 
When you tap on the green tick a Weed form will appear on the App. Fill that out, Save and the track will turn yellow. Note that a weed name now appears on the screen as shown on the right. 
Tap on the button (bottom left). The red  and green
  will appear. Select the yellow track by tapping on it. The track will turn white. Tap on the and the Control or Check form will appear for you to fill out. Fill in the control or check details, tap and hold the SAVE button until it turns green. Note that once you been through the process once the App will autofill the next control form.


