Using the map tools
The map tools will be used to record your information on weeds for your project. Once identified, weed control can be monitored, assigned for control and record any controls which have been carried out. The map tools can also be used to record relevant features, tracks and work hours.
Moving around the map
You can pan around the map by clicking and dragging anywhere on the map. Use the icons in the top left corner of the map to zoom to your desired mapping area
|
|
Zoom in
Zoom out |
|
|
Make the map full screen |
|
|
Exit full screen |
Understanding the map tools
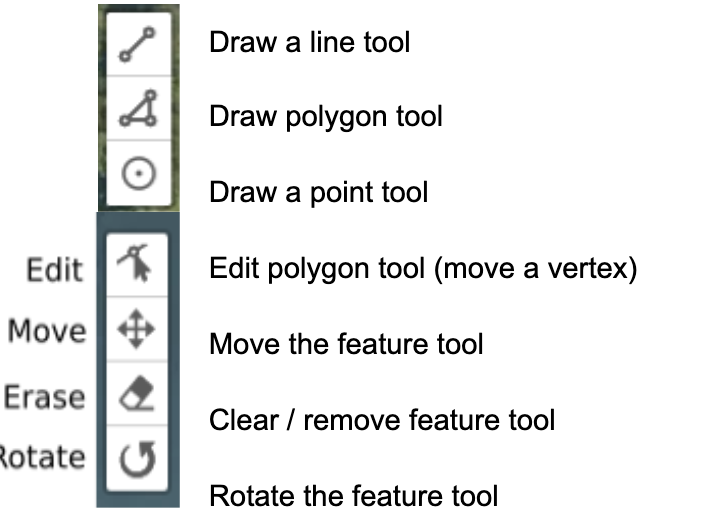
The map tools can be found at the top, right of the map. You can see the name of each tool by hovering the mouse over the icon.
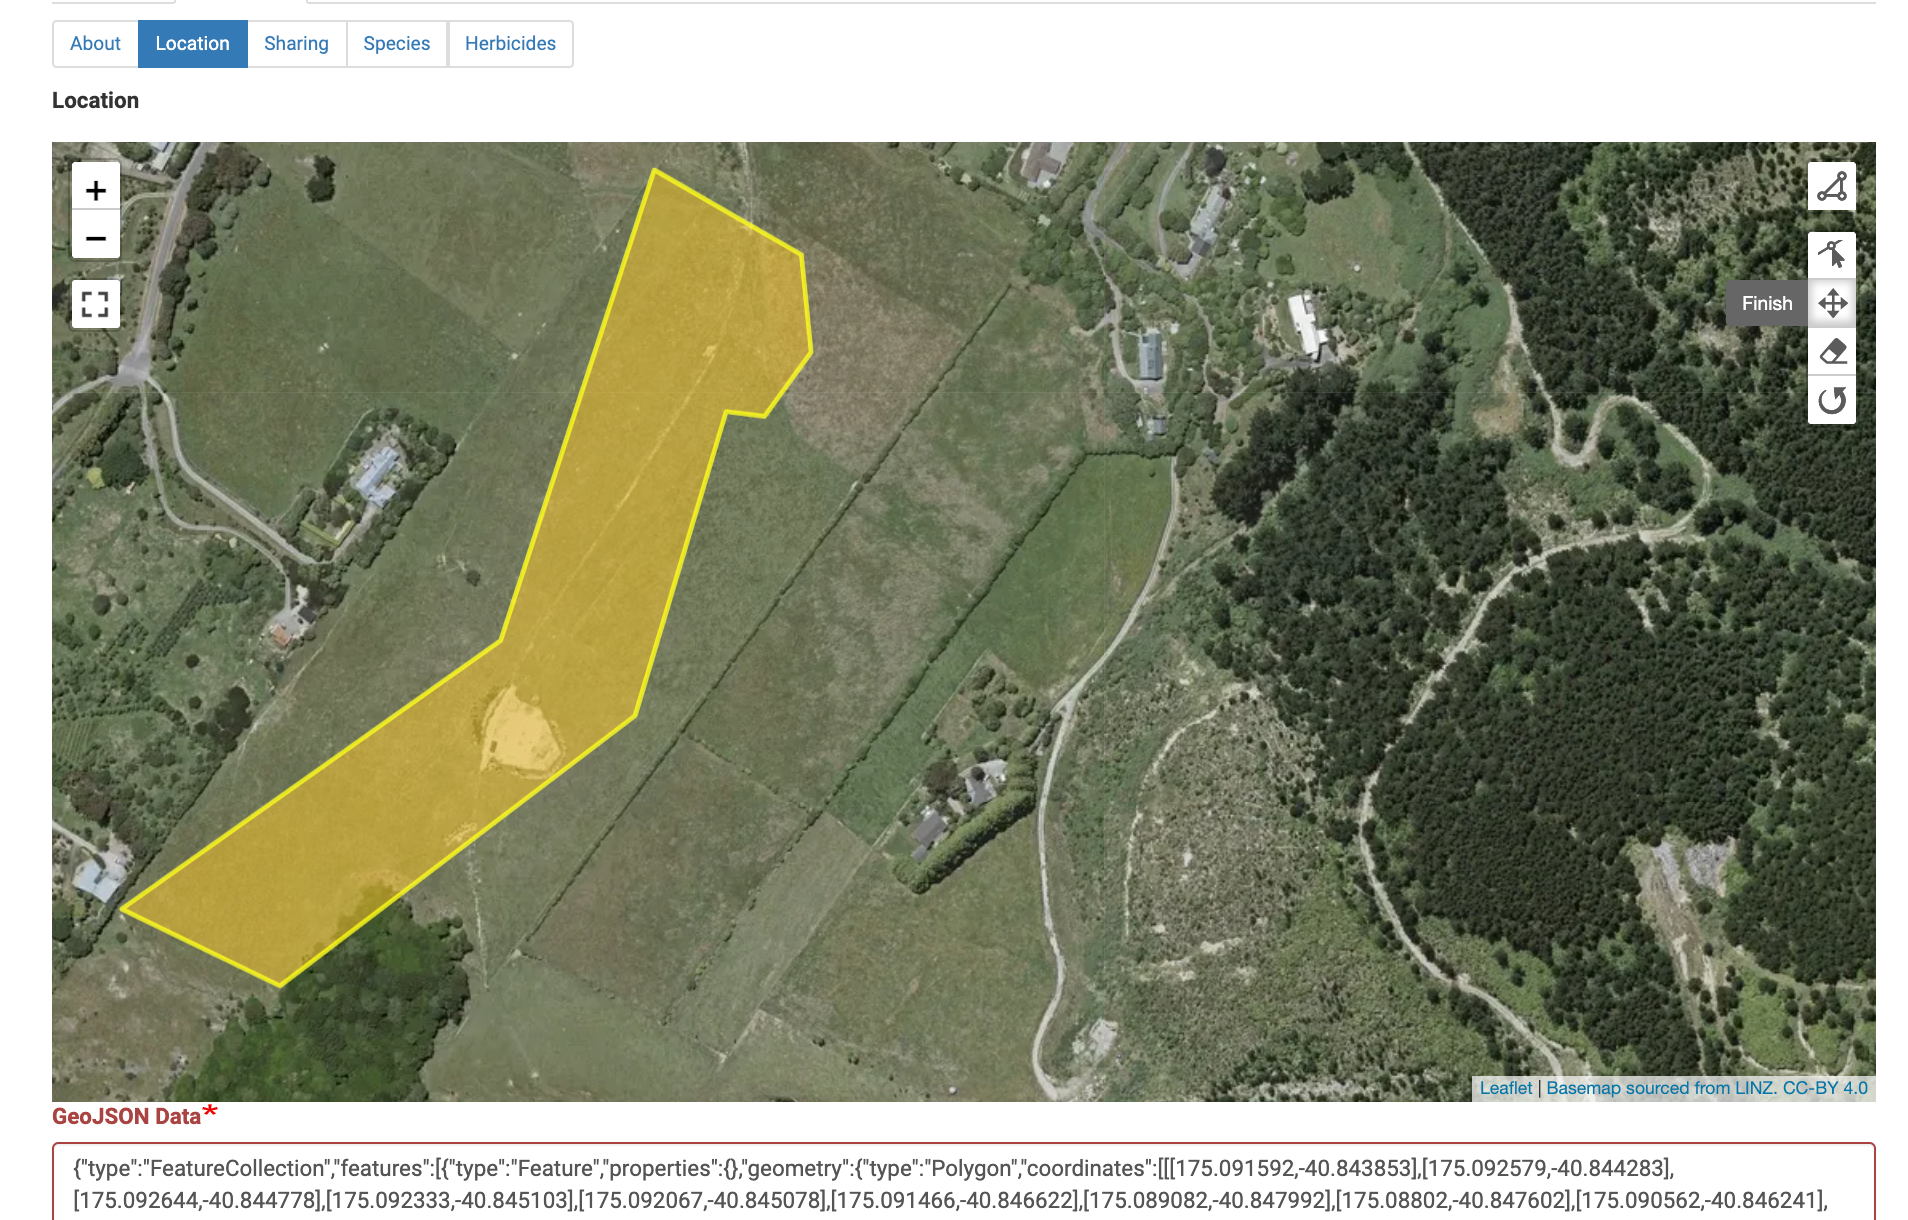
Drawing a shape with the map tools
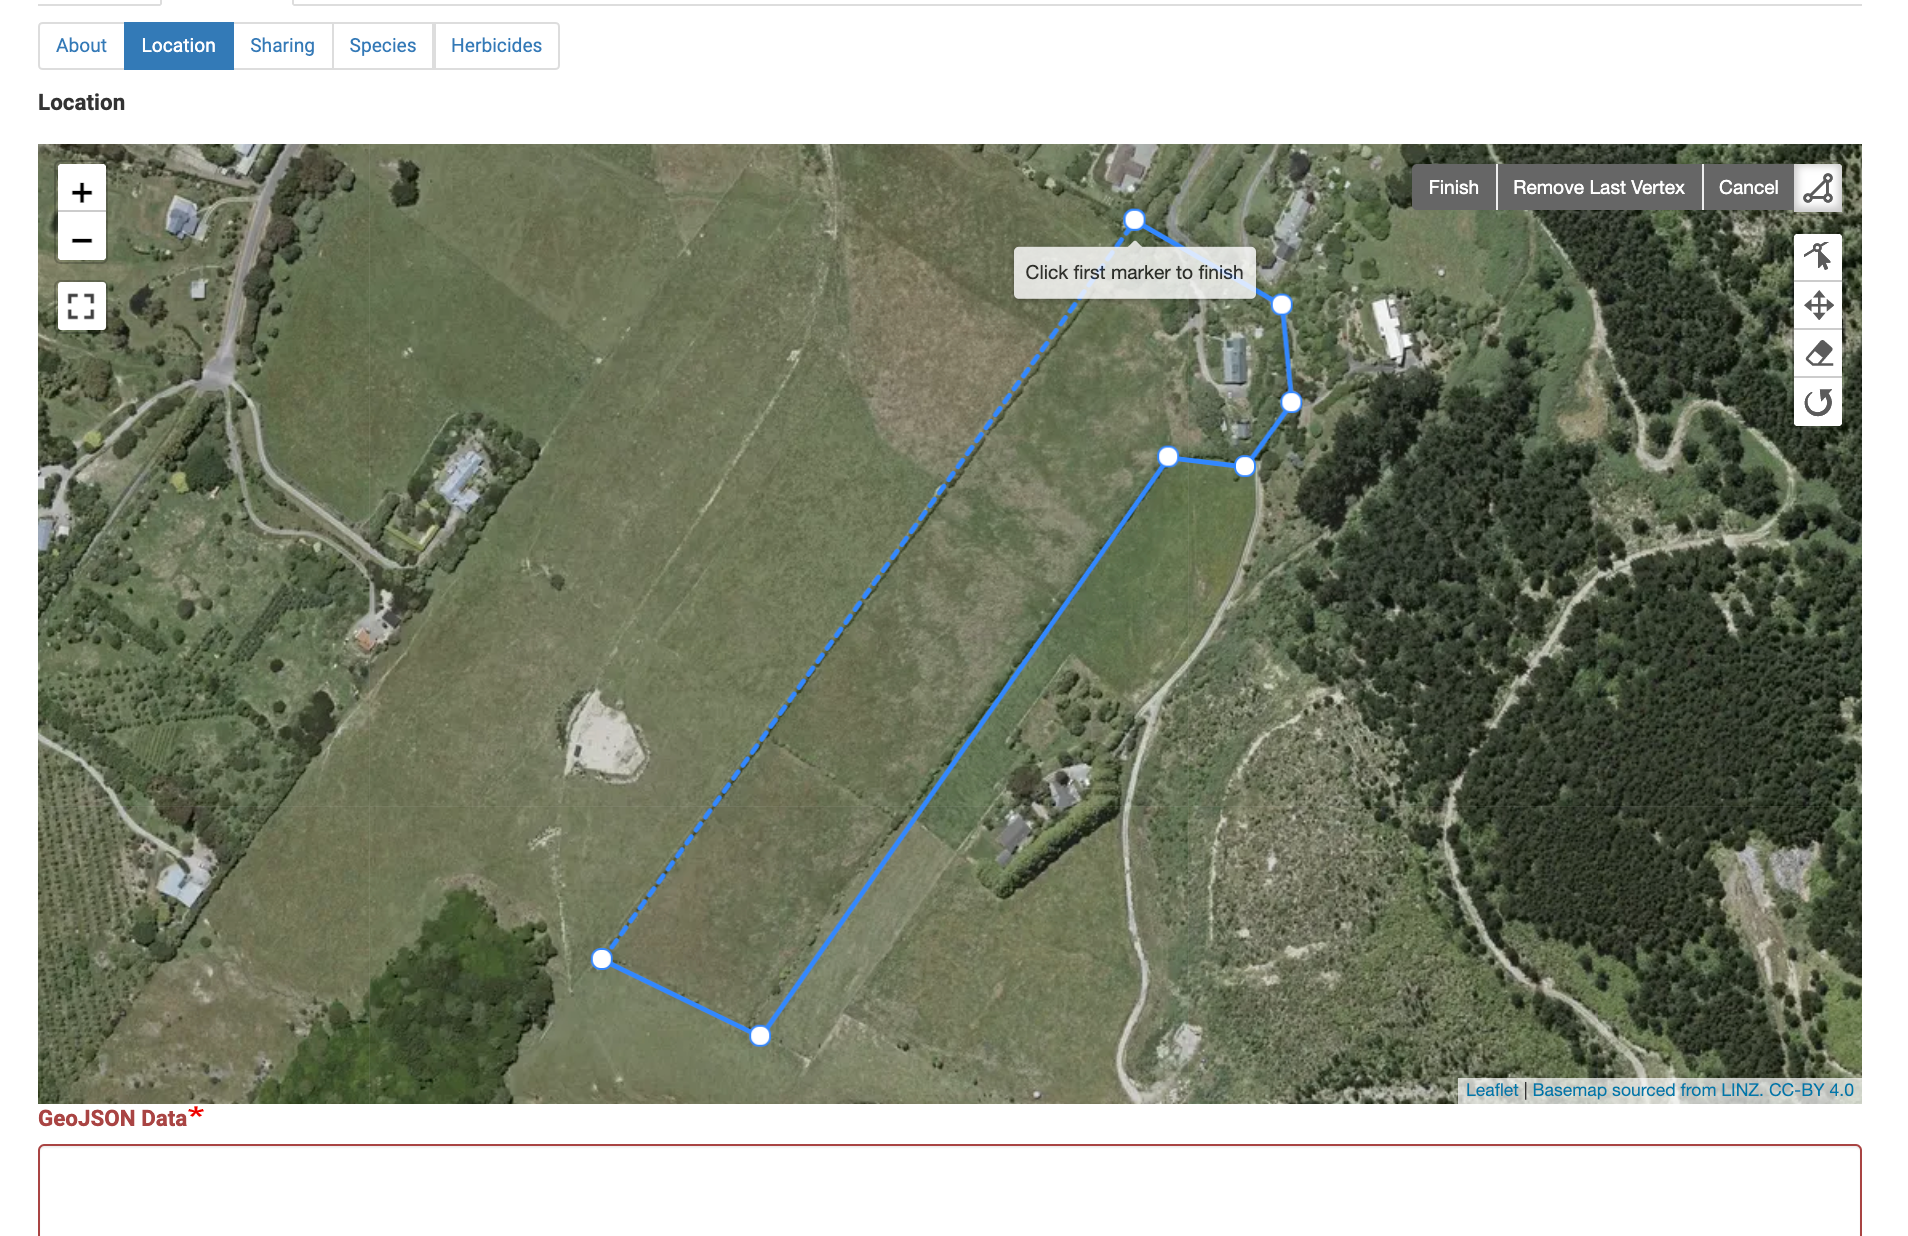
- To start drawing a polygon on the map, click on the polygon tool to activate it.
- With the polygon tool active, click on the corners of the area that you want to manage. This will define the boundaries of your shape.
- To finish, click on the first marker to close the shape.
Editing a shape with the map tools
If you didn't get the shape quite right you can change it:
- Click on the "Edit" tool.
- The vertices of your shape will have white circles - you can drag any of the circles to adjust you shape.
- When you are done adjusting, click the "Edit" tool again and the outline will return to normal

Moving the shape on the map
If you drew the correct shape but put it in the wrong place you can drag it to a new location on the map.
- Click on the move features
 (or Drag layers) tool.
 - Now click inside the shape you drew and drag the shape to where you want it to be
- When you are done moving, click the move features tool again.